
I am Owen Wilson
Hello, I am Owen Wilson! For the past five years, I've been focused on growing as a developer - learning new tools, and building a solid understanding of how things work. I'm especially interested in graphics, and game development, but I just enjoy creating things that feel meaningful to me. If you're curious about what I've been working on, feel free to check out my projects below.
Skills
Programming Languages
Frameworks/Libraries
Tools
Projects
OpenGL Fluid Simulation
Overview
This project is a real-time 2D fluid simulation built entirely in OpenGL, based on the Navier-Stokes equations and the methods described in Jos Stam's seminal "Stable Fluids" paper. I implemented the pressure solve, advection, diffusion, and projection steps on the GPU using compute shaders, allowing the simulation to update at high framerates without relying on CPU cycles.
1. Navier-Stokes Implementation
The core of the solver follows the Stable Fluids approach: velocities are advected, diffused, and projected to enforce incompressibility. I implemented the linear system for pressure using Gaussian elimination on the GPU first, as this was the primary bottleneck. This created a stable, and smooth simulation when interacting with forces from mouse input and boundary constraints.
Real-time simulation running entirely on the GPU.
2. Compute Shader Acceleration
The biggest technical improvement was rewriting the entire CPU-based solver into GLSL compute shaders. Each step advection, diffusion, projection, and boundary handling runs in massively parallel GPU threads. This increased performance dramatically and enabled much higher grid resolutions and more responsive interactions compared to the original fragment-shader and CPU implementation.
Source Code & GitHub History
All the code for this project is available on my GitHub repository, including the full source, shaders, and supporting assets.
You can check it out here:
GitHub Repository - GL Fluid Sim
OpenGL Rendering Engine (Learning Project)
Overview
This project was my first dive into OpenGL. I built a simple rendering pipeline that progressed from drawing basic shapes to displaying fully lit and textured 3D models. While it's not a full "engine," it helped me get familiar with the core components of real-time rendering. I've been exposed to computer visualization concepts before (more on that later), so this was a really fun project to actually put all my learning to good use. This project also branched into another side project intended solely for 3D models (made from blender).
1. Primitive Shapes and Buffers
I started with rendering simple primitives: a triangle, then a square, and finally a cube. This helped me get a handle on OpenGL's VAO, VBO, and EBO system. It's also where I wrote my first Vertex and Fragment shaders for OpenGL. I had written shaders before (hlsl) inside Unity's scriptibal pipeline, and GLSL is mostly the same, but nonetheless it was really fun seeing how customizable you can get with no limiting factor like Unity. I also got to apply some cool math in this portion, where I manipulated my objects with rotation equations using transformation matrices, which I learned from a Graphics Book by Fletcher Dunn.
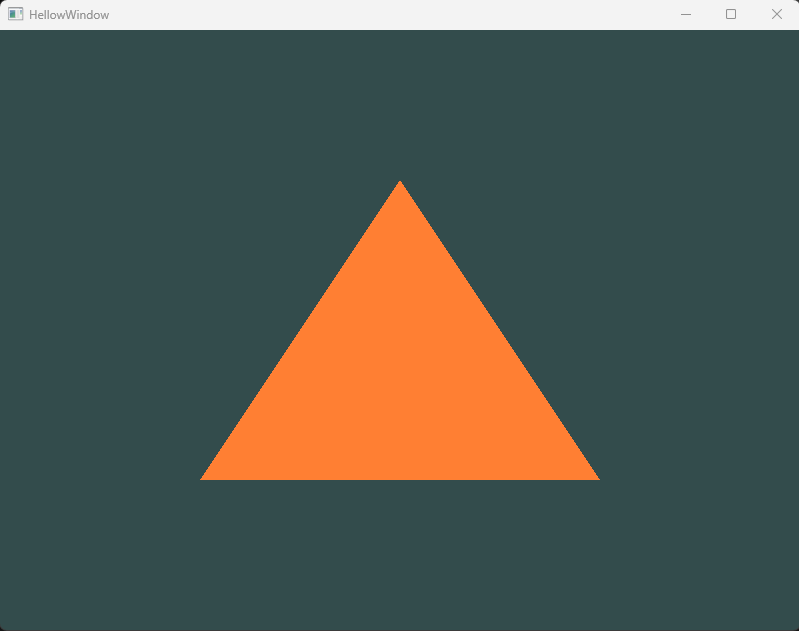
My first triangle rendered using a VAO.
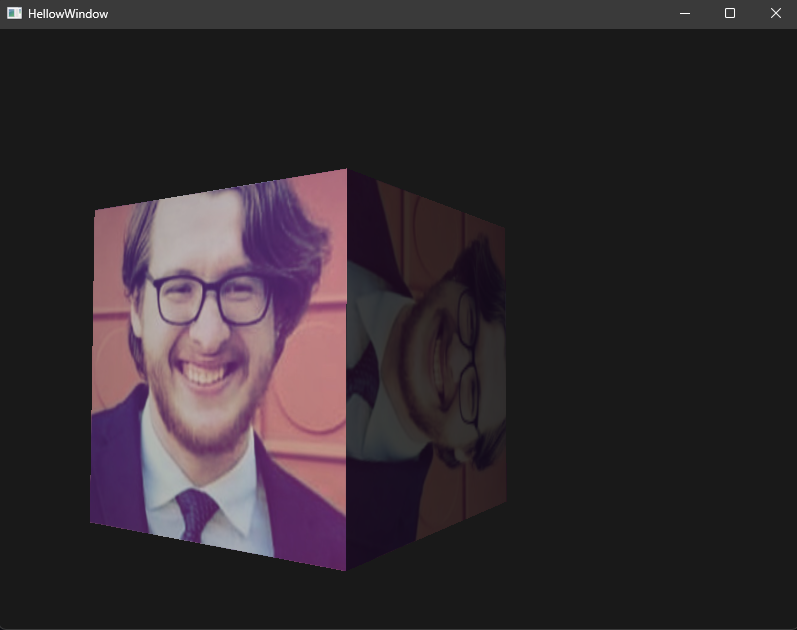
A rotating cube, textured with an image of my friend's face.
Multiple rotating cubes, textured with an image of my friend's face!
2. Camera System
Next, I added a camera system with basic movement + zoom controls. This made navigating the scene possible and laid the groundwork for interacting with 3D space. It was cool seeing how OpenGL has so much support for Input mapping, which was something I was not expecting going into this project.
Input mapped camera system. (in a more complex scene)
3. Textures
Once I had geometry and movement in place, I added texture support. This included loading images, mapping TextureCoords correctly, and testing with multiple textured cubes. I messed around with a new library stbi_image by Sean Barret. And I learned about Mipmaps and Texture Filtering. I also got to do more work with shaders here, as now I could use the TextureCoords in the color processing.
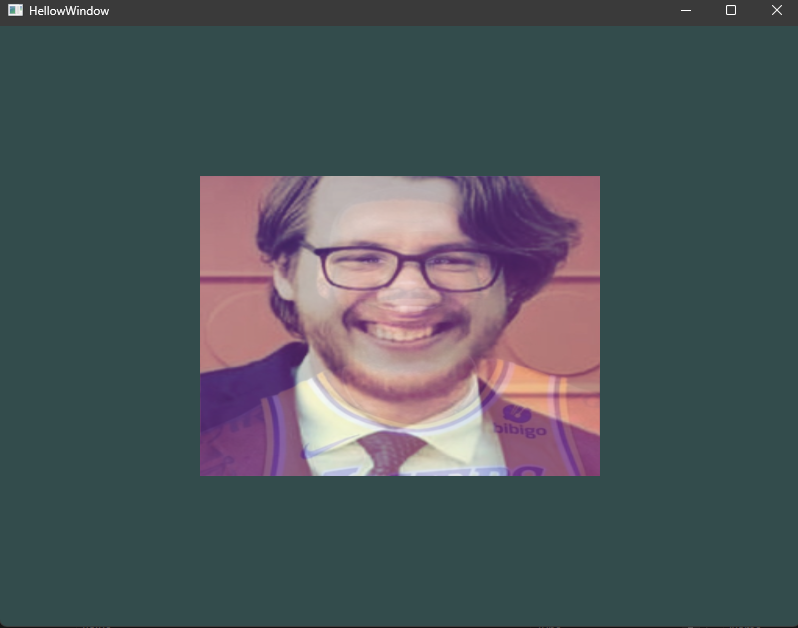
Totally normal image of my friend, that definetly doesn't have Lebron secretly hidden as a opaque second texture.
Textured cube, with light mapping.
4. Lighting
This was by far my favourite part of the project, which is probably reflected by just how long this text is. I learned a ton about all the many ways lighting can influence an object. Pretty soon after I implemented a basic Phong lighting model, which I learned all about ambient, diffuse, and specular lights. This was a massive highlight for me, as I am obsessed with math, and the calculations required for these lights are so intriguing and intuitive, I could write a whole essay about how much I loved the math behind these techniques, but I'll save you the time. I spent a ton of time messing around with different values to simulate different materials, which can be found here. After that worked, I added lighting maps (Diffuse, and Specular) to my textures, this really opened my eyes on whats possible with materials and this will be my new norm for creating custom textures. I then extended the project to support directional light, point lights, and spotlights-all active in one scene, this again was really fun as I got to delve more into all the linear algebra involved in lighting calculations. Like I said at the start, this portion of the project was absolutely a blast, and lighting is by far my most favorite part of programming.

Directional light diagram, showing how all rays are parallel, meaning light calculation is the same for all rays.

Point light diagram, showing that as light scatters from its source, it becomes attenuated.
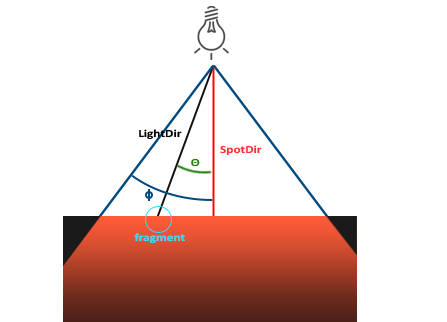
Spotlight diagram, showing the vector pointing from the fragment to the light, the radius (Phi ϕ), and the dot product of the light direction and the spotlight direction (Theta θ).
5. Model Loading with Assimp
I integrated another library: Assimp to load external 3D models. This allowed me to render more complex assets with their own defined vertices, faces, meshes and materials. This part was actually pretty straight foward for me, as I had already built up a lot of foundations in the project beforehand. It did involve me making two new classes. I even got to add some pretty advanced stuff in here like tangent-space normal mapping and vertex skinning, but I never got to utilize them.
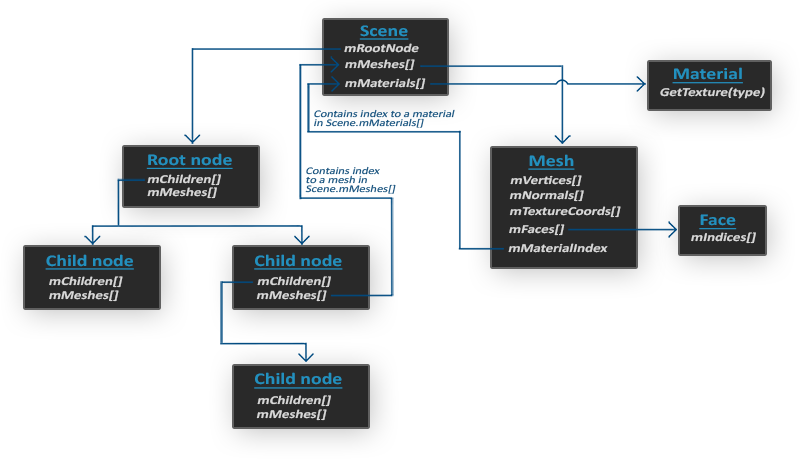
Simplistic model of Assimp's structure.
6. Depth and Stencil Testing
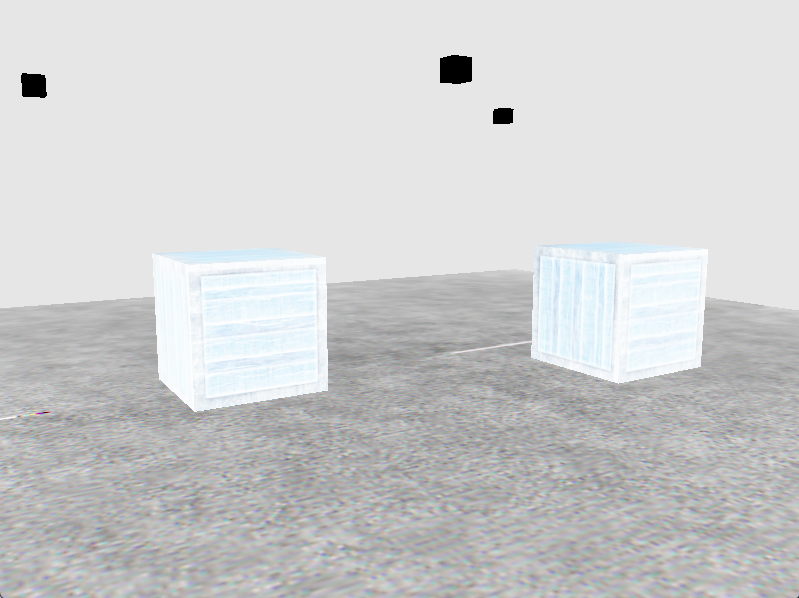
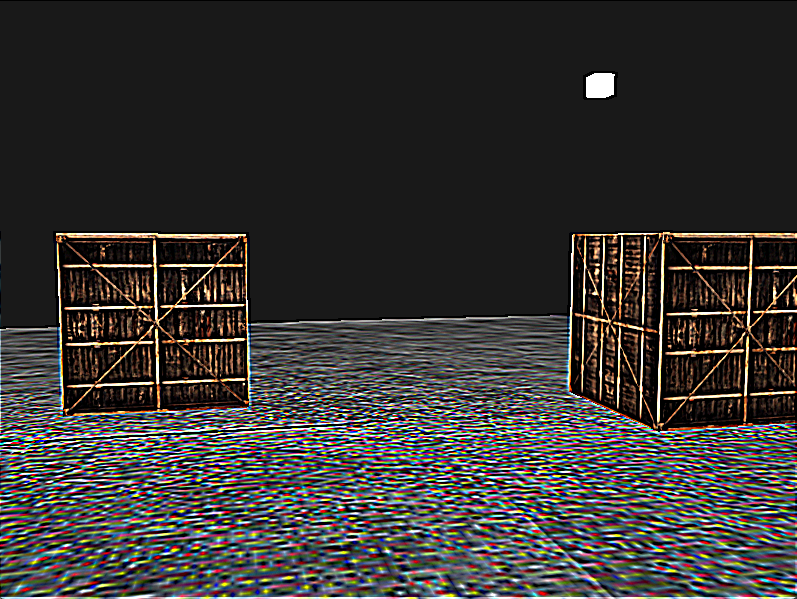
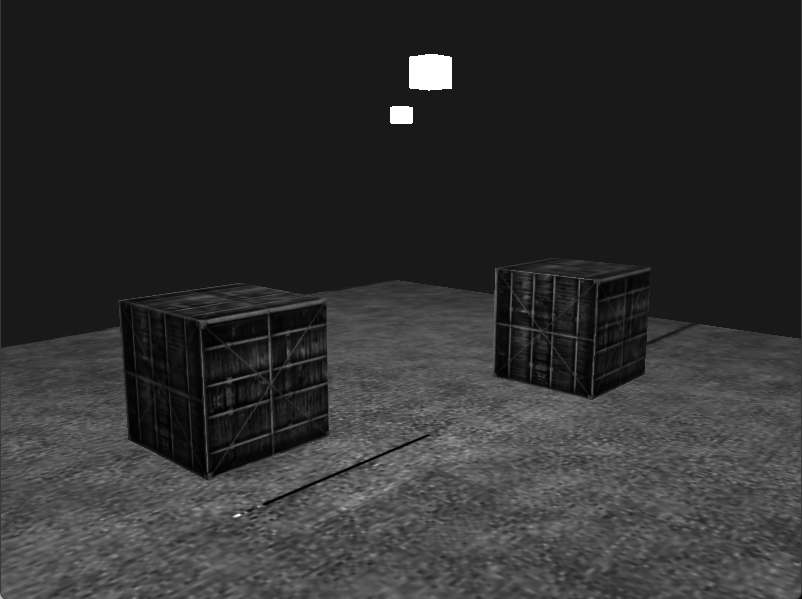
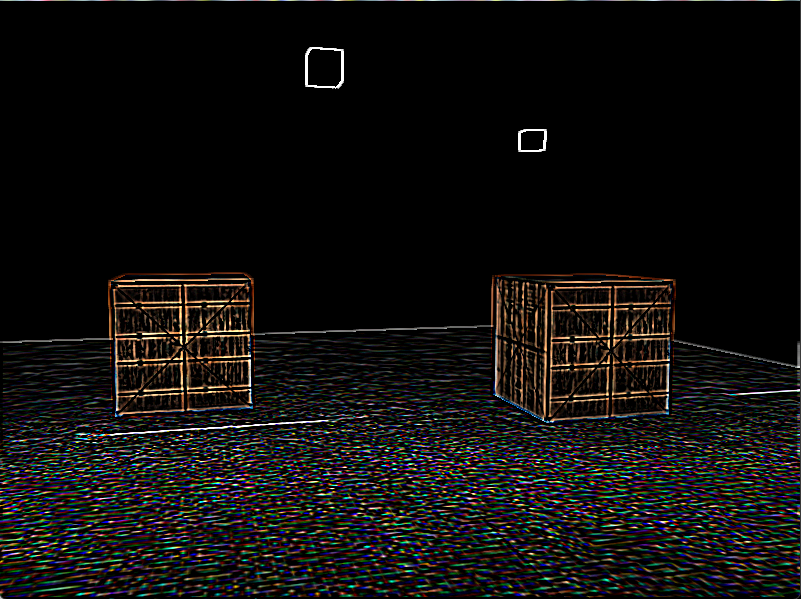
Here I experimented around with depth and stencil testing inside my project. I learned about linear/non-linear depth buffers to calculate Depth value precision, and how the depth value is more precise the closer it is to the near plane. I also had fun with some heavy math operations, as calculating the depth values involved a ton of work with the projection matrix, which I learned from this article that explains the matrix in massive detail. Afterwards I played around with Stencil Testing, which is I felt was super valuable experience. There is a bunch of functions already baked in to OpenGL's library, so I had a ton of settings to explore. I ended up using the stencil buffer to outline various objects within my scene. I made an X-ray, and a "selection" action (like selecting something in a RTS) inside an outlining algorithm. There is definetly a lot more I want to explore with these, but I'll save that for when I am making an actual game in this engine.
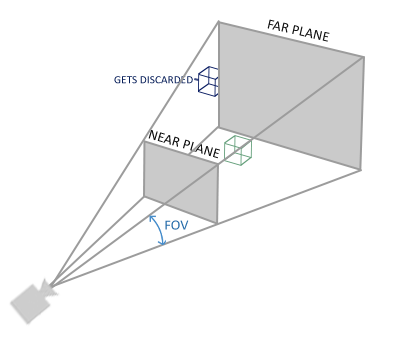
Near and Far plane of the projection matrix, used in depth value calculations
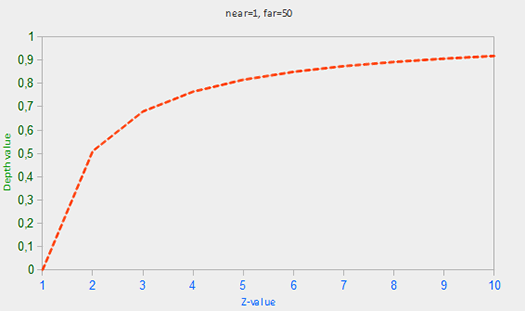
Non-linear graph of the relation between the z-value and the resulting depth buffer's value.
7. Blending
This was a really interesting part of the project for me. Although not as math heavy as the previous section, my eyes were still opened by the complexity of blending. I expected this to be a simple chapter, seeing as how the blending equations were quite intuitive and easy to understand, but once I realized how the depth buffer interacts with transparent objects it became much more intriguing. I started off with some simple fragment discarding, using a grass texture (the grass is on a transparent white background). It involved me mapping normals to the texture, and then modifying the way OpenGL samples textures (OpenGL interpolates the border values with the next repeated value of the texture, but since im using transparent values, the top of the texture image gets its transparent value interpolated with the bottom border's solid color value. Which in result gives a white border around the quad. I solved this by setting the Texture Parameter to use GL_CLAMP_TO_EDGE.). After that I started on actual blending, using a red window texture. The blending equation is actually really simple, fusing the colors based on the alpha value of the source texture and storing it in the color buffer. OpenGL already had a bunch of functions built for this, so it was really easy. What wasn't easy though is how these windows interacted with depth testing. I found that when looking through any transparent window, all other windows behind would vanish. This is because when writing to the depth buffer, the depth test does not check if the fragment has transparency or not, therefore it acts as if it is an opaque object. So to make blending work, I had to draw the most distant window first, so by sorting the objects based on the distance from my camera's position vector, I solved the issue. This was really interesting for me, because there is a ton of ways people have tried to solve this issue for blending. I used a sorted technique, but I did research into the many order independent transparency (OIT) techniques both accurate and approximate - which exposed me to some advanced areas of blending (like using framebuffers, or depth peeling).
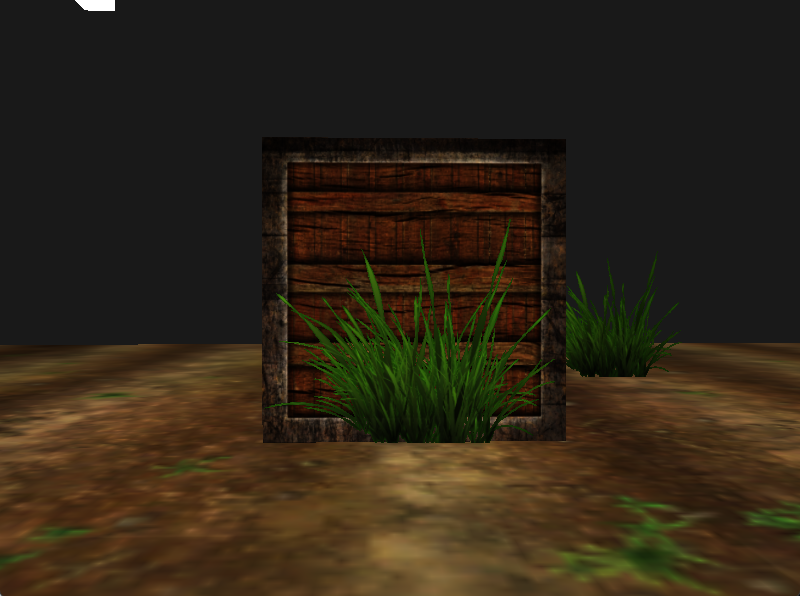
Grass texture, rendered by discarding fragments.
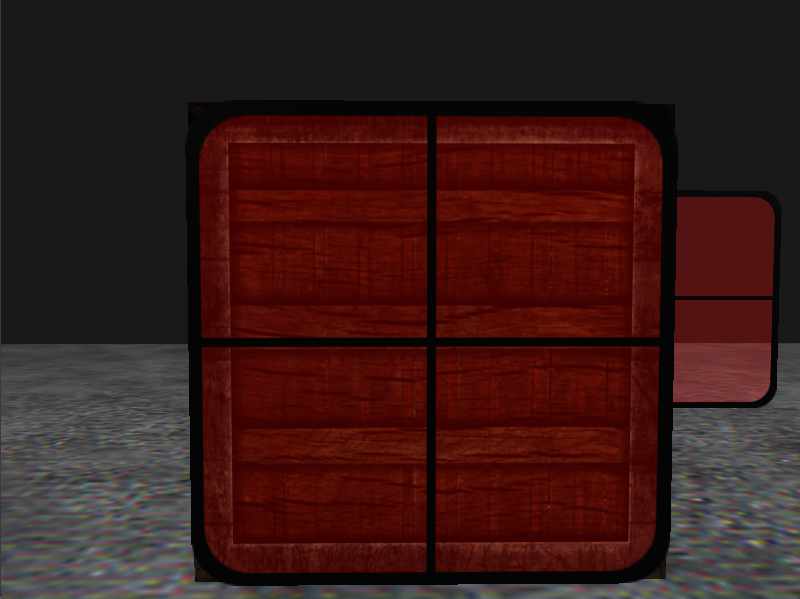
Semi-Transparent window, blended with the background container.
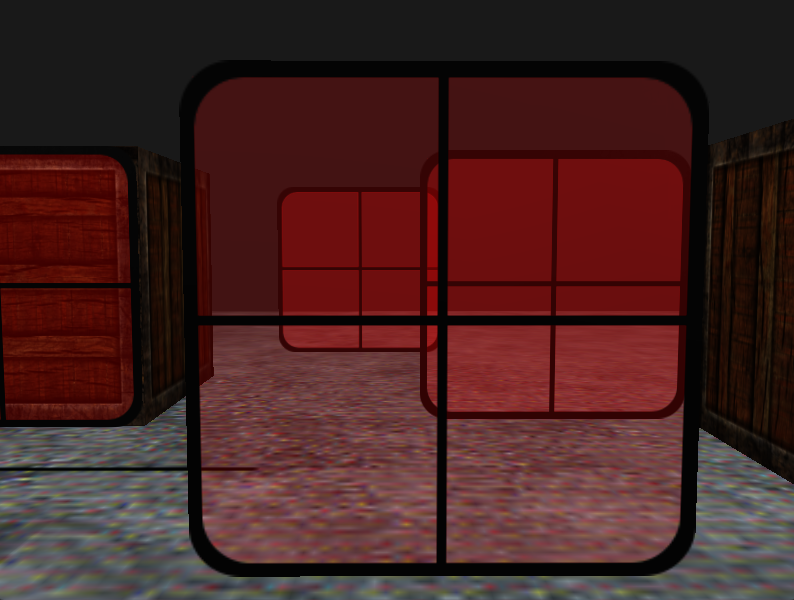
Depth testing fix by sorting the order in which transparent objects render.
8. Post Processing
This was a pretty exciting section of this project. I got to learn about framebuffers, which is basically a bitmap for the current frame. Framebuffers are cool however, because you can do a bunch of Post processing effects, or Mirrors in your scene. This works because, you are essentially rendering in the entire screen into a texture on an invisible quad infront of the camera. I also got to expeirment with the different ways you can set up your framebuffer aswell, I ended up creating using a texture, depth, and stencil buffer all combined into the framebuffer. Once I had set it up, It was super easy adding post processing effects in the fragment shader. I got to apply some of the math I have been learning here, now that I can use Kernel effects, which are just a small matrix like array of values. I used this: website here to visualize the effects of whatever values are used in the kernel. Overall the framebuffers are a super helpful tool when programming graphics, so this was a really fun chapter.
Blur effect, using a kernel.
Inversion effect, by inverting the texture color.
Sharpen effect, to simulate an Acid trip.
Grayscaled effect, by averaging the RGB values, and accounting for the human eyes sensitivity of green colors.
Edge detection, which is similar to the sharpen kernel, but darkens the surroundings.
9. Cubemaps and Environmental mapping
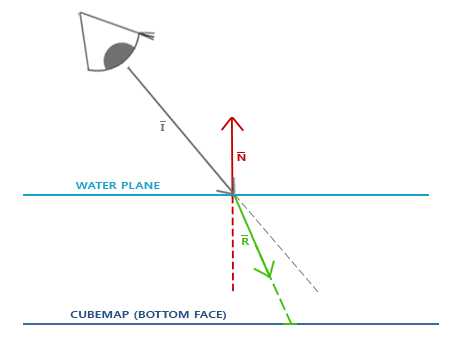
I finally got to do some major changes to the scene during this section! I first added a skybox, which was renderered using a cubemap, and was pretty straight fowards. But where this got really fun was messing around with environmental mapping. I got to do some fun calculations for reflection and refraction techniques. This type of math is always my favorite, as it uses vectors and normals to calculate and draw a reflection/refraction vector that maps to texture coords. These parts always feel so satisfying, because its when all of my previous work on the project, all come together to form the remaining pieces of the puzzle. I 100% left this part feeling satisfied in my work so far.
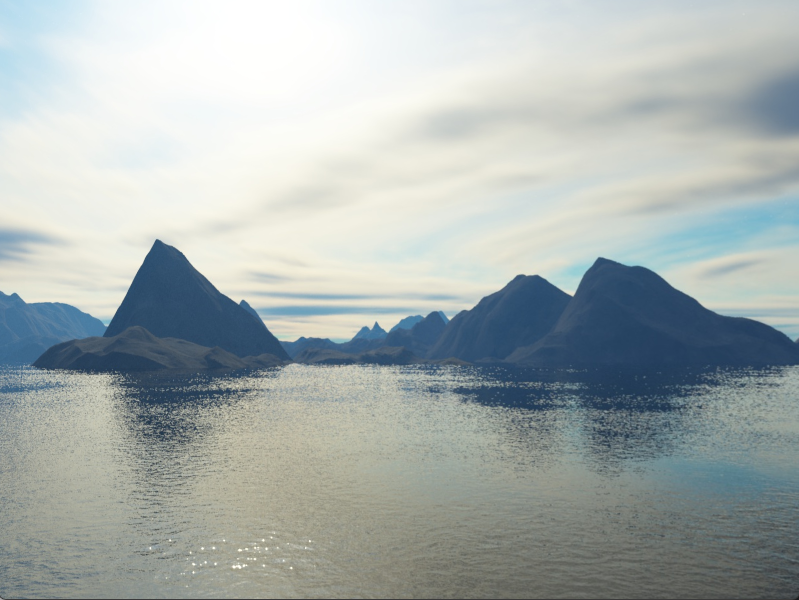
Skybox cubemap rendering in the scene.
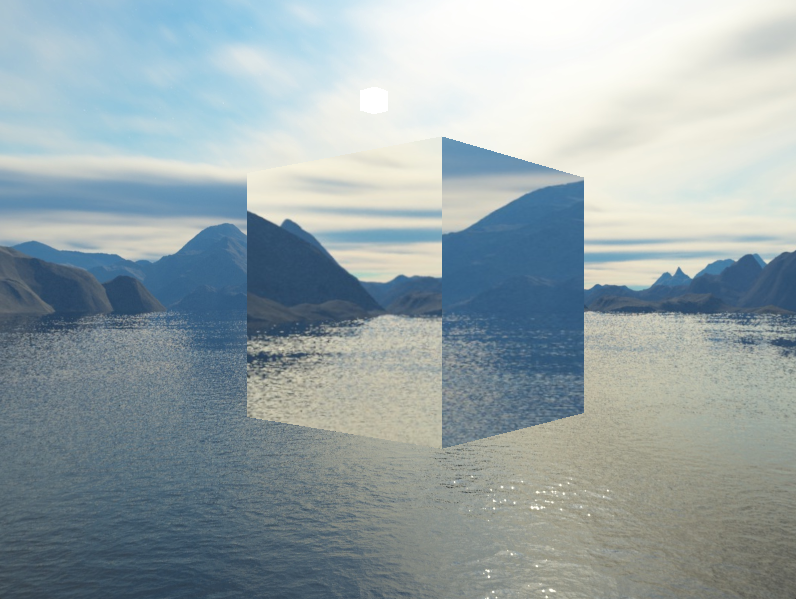
Environmental mapping, reflecting the enviornment around the cube.
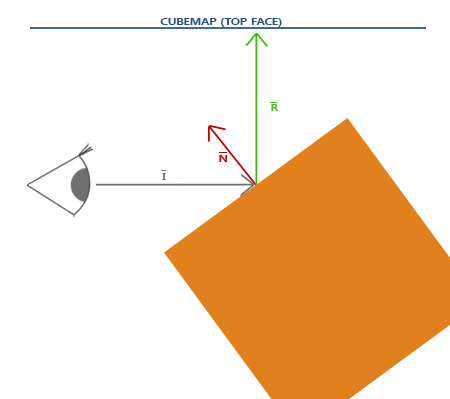
Reflection theory diagram. Detailing the view direction vector I, the Normal vector of the cube N, and the reflection vector R which finds the texture coords of the cubemap
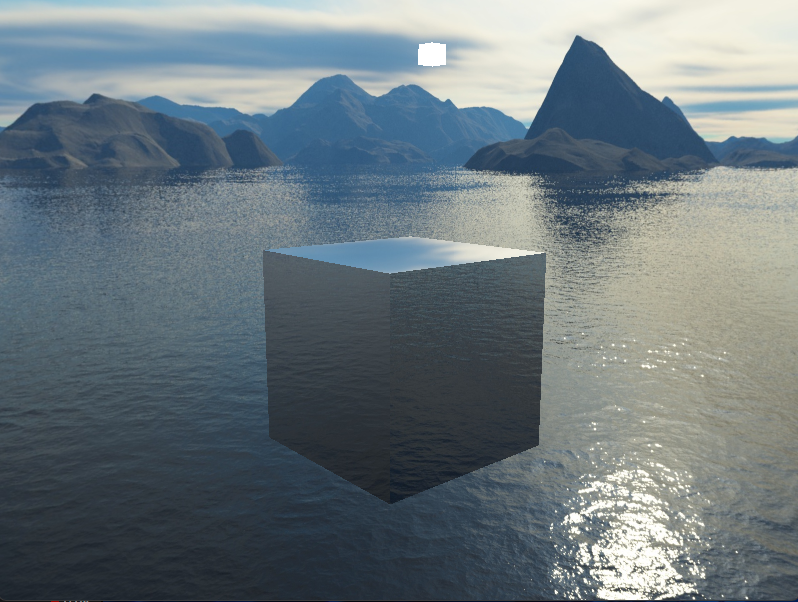
Environmental mapping, refracting the light from the enviornment around the cube.
Refraction theory diagram. Detailing Snell's law, containing the view direction vector I, the Normal vector of the refractive object N, and the refraction vector R which finds the texture coords of the cubemap
Learning Process
Even though this was my first OpenGL project, I had a solid foundation going in. I'd already read 3D Math Primer for Graphics and Game Development (Fletcher Dunn) and Foundations of Game Engine Development by Eric Lengyel, as well as a strong theoretical understanding of linear algebra from Gilbert Strang's textbooks. Those books helped a lot with the math side of things.
Throughout the project, I followed the LearnOpenGL tutorials. Thanks to the reading I'd done beforehand, the material clicked pretty quickly, and I was able to apply it in my own setup without just copying the code.
Source Code & GitHub History
All the code for this project is available on my GitHub repository, including the full source, shaders, and supporting assets. You can actually follow along with how I built each part of the renderer from the ground up, step by step by checking out the Commit Graph. It's a pretty honest snapshot of how I approached the project and how it evolved over time.
You can check it out here:
GitHub Repository - OpenGL Renderer
Compute Shader Graph
Overview
This was a GPU-heavy project in Unity where I built two separate visualization systems - one for rendering mathematical shapes using a compute shader, and another for animating a fractal hierarchy with Unity's Job System.
1. Compute Shader
For the graph system, I wrote a compute shader that positions thousands of cubes on a grid based on different math functions (like sine waves, ripples, spheres, etc). These functions are all GPU-driven, which means they update in real-time without needing the CPU. I also wrote a small HLSL shader that colors each cube based on its position in world space - but it's not required, it only makes the shapes look way dynamic as they animate.
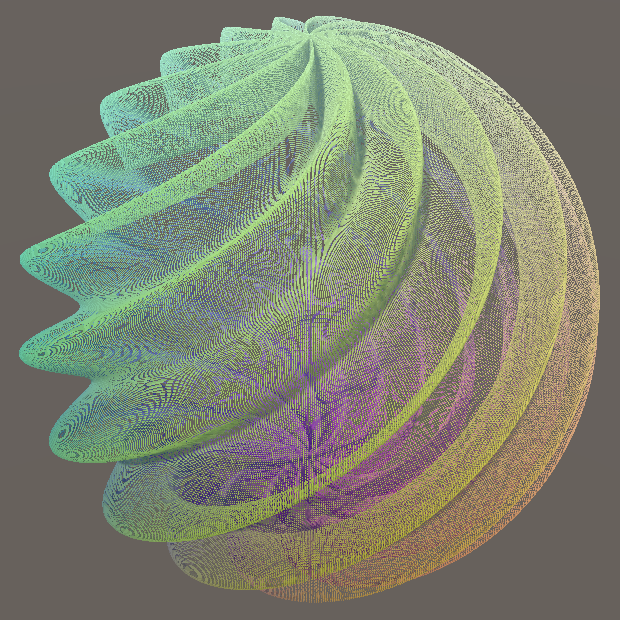
A Sphere instantiated with the compute shader.
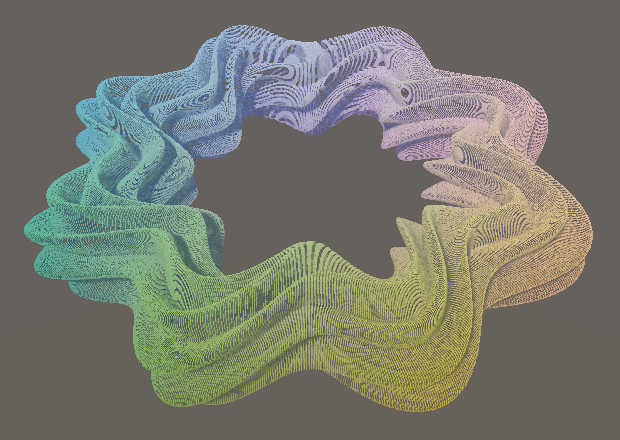
A Torus instantiated with the compute shader.
Multiple shapes, morphing into eachother using linear interpolation.
2. Job System
The second part of the project was a recursive fractal generator, where I used Unity's Job System + Burst to calculate all the movement and rotations for each "fractal part" in parallel. This kept the performance solid even at high recursion depths. After getting the base animation working, I tweaked the HLSL shader again to vary the colors by fractal level and world position - I was going for something a little more natural and less grid-like than the graph system.
Rotating Fractal, with organic variation in the shader.
Source Code & GitHub History
All the code for this project is available on my GitHub repository, including the full source, shaders, and supporting assets.
You can check it out here:
GitHub Repository - Compute Shader Graph